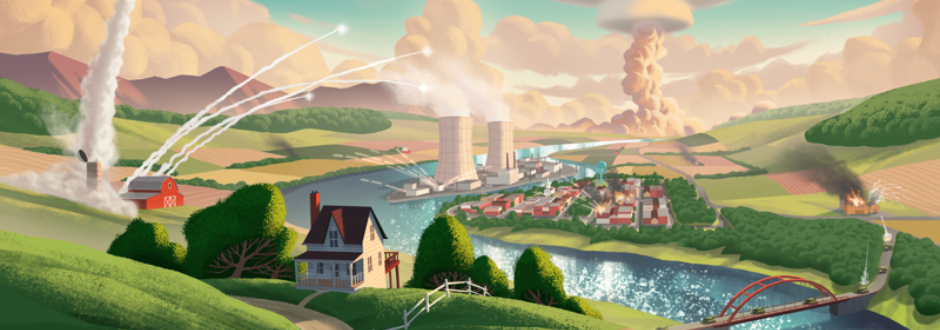
In Farms Race, you'll step into the boots of a sentient animal general and lead your herd across the countryside to wrestle back control from those idiot humans, as well as the other upstart animals trying to do the same thing. If you can dominate the land and reach that 10 Victory Point target you can be declared the victor, so start building up armories, stealing opponent’s territory and, of course, establishing the largest nuclear arsenal before launching it in defensive retaliation and sending everyone else to kingdom come, even the guys who weren’t attacking you! Let the true arms race begin!
Herd Up

Begin by constructing the map with the amount of hexes determined by number of players and how confrontational you would like it to be. You can also go away from the pre-built maps but it isn’t recommend as may be unbalanced.
Sort out all the tokens and cards by type next to the board. The resource cards are kept separate by type, the Spy cards are shuffled to make a face-down deck. Place one human token face-down in each non-starting region, keeping the number secret.
Each player chooses a herd and takes the reference card and all related pieces, then everyone is dealt 2 mutation tiles, the remainder are not used so can go back into the box. Once you have chosen a start player then you can take turns to finish set-up.
So, beginning with the first player and going in turn order everyone will perform the following steps:
- Choose one of their two mutation tiles and reveals it for their herd, the other is discarded back into the box.
- Select any unoccupied starting region on the map as their home hex. Place a barn into the region along with 2 healthy herds (heart side is face-down)
- Finally, if the player is later in turn order they make take starting resource cards, 3rd player gets to take any 1 card while 4th and 5th players will take any 2 resource cards..
- Now you’re ready to begin! The starting player kicks it off and turns continue clockwise during the game.
Learning The Art Of War
Each turn in Farms Race is split into 4 phases. They begin with the Preparation phase before moving into phases 2-4, which I call the ‘Main’ phases - Actions, Resources and Discard. I say this because as well as the steps to take each phase you can also always opt to do some free actions at almost any point during the three phases, which are building things, trading resources or launching nukes! I say almost any point as these actions become unavailable if you are currently performing some warfare actions (with one nuke exception that will be covered later).
Phase 1 - Preparation phase.
Place a healthy herd at each building you own, barns or armories. If you control any regions with a turmoil token then remove the token. Additionally, remove a turmoil token from any uncontrolled regions on the map.
Phase 2 - Action phase
Each of your herds is allowed to take one action to either move or heal. Healing herds just stay on the spot and flip over from the damaged side (showing the heart) to the healthy side. Herds that choose to move can go into one adjacent region. Multiple herds may move at once and you can also choose to move multiple herds from different regions into the same region at the same time. Each region can only hold units from one team, so if you move into a region with any humans or opposing herds then combat starts.
Combat
This is the first of the two warfare actions, while in combat you cannot trade resources, build things or launch Nukes.
To begin combat you must declare all herds that are attacking the region, no more may join after combat begins and you can only attempt to enter each region once per turn. If you are attacking a human-held region and the token is still face-down then it is only revealed after combat has started.
During combat both sides roll dice simultaneously, each herd or human contributes one dice to the roll. Humans are only damaged on the roll of a human or a gun while herds are only damaged on the roll of a gun. Blanks have no effect. Then additionally each side adds one damage per Armory they control. Humans only have one health so they lose one human per point of damage. Herds have 2 health and the controlling player chooses how to spread the damage, every 2 points of damage can remove a healthy herd from the board while every 1 point can either damage a healthy herd or remove a damaged herd from the board. After the damage is dealt if neither side has been eliminated then players can choose to retreat, starting with the attackers. Humans will never retreat though and always fight to the death.
If the attacker retreats then they return the herds to the original regions they came from, making sure if they were from multiple regions then each region does not end up with more herds than it started with. If the defender retreats then it must be to an adjacent region they control, if one does not exist then it can be any adjacent uncontrolled region with no humans, though if neither exist then the defender cannot retreat, After retreating if any humans were left over and had been damaged then swap out their token for one with a lower number, this will stay face-up.
After a combat round if neither side has retreated or been eliminated then keep going. Once combat finishes if the attacker was victorious then they move all attacking units into the region. Then check if the region contains a Turmoil marker. If it does then take no further action. If it does not then they take 1VP token from the supply and place a Turmoil token into the region. You only gain a VP token this way by conquering a region that contained enemy herds at the start of you turn, and you only conquer the region by moving your own herds into it. Once you have conquering a region then destroy any enemy buildings present in it, you will not need any attack rolls to do this. In the case where all herds on both sides have died then you are not able to move herds into the region so you may not conquer it. You cannot bring in any more herds this turn as you can only attempt to enter each region once per turn, bring more herds next time!
Any player who loses all their herds and buildings is unfortunately out of the game.
Phase 3 - Resources phase
Roll the two resource dice. For each symbol shown players who control the matching region will gain one Resource of the matching type. If both dice show the same symbol then all players collect 2 Resources per region. The last side of the dice shows a question mark, in this case the rolling player chooses the region it represents, but they do not automatically get the matching resource unless they control one of these regions. On double question marks you only get to pick one region type and they will provides 2 per region. Resource cards are not limited so if one type of card runs out then use a temporary method to track. The type of resource cards you have may be kept hidden from your opponents but the total number of cards may not.
Phase 4 - Discard phase
You must discard down to 7 resource cards. Note that only the active player discards down, and you can still build and trade resources during this phase.
Main Phase Free Actions

Building - Your reference cards show the 4 buildable things available to you and the costs to do so.
Barns are built in a hex you control that doesn’t already contain a building, providing 1 VP and also generates herds during the Preparation phase.
Armories can only be built by upgrading a barn as well as paying the resource cost. Like a Barn they still generate herds although their VP value has doubled to 2. In addition they provide a bonus damage for your herds in every combat they are in.
Spy cards are recruited from the Spy deck when built, they are kept secret from the other players until you play them, although apart from the Spy Cards that provide VP you cannot play any Spy Cards on the turn you build them. If the Spy deck runs out during the game then no more spies can be built.
Nukes provide a Nuke token when they are built, this is taken on the ready side. The first person to build a Nuke take the Nukiest tile which provides 1VP. If someone ever builds more Nukes than the player holding the Nukiest tile they may take it from them immediately. Nukes can be launched on the turn you build them or can be saved for future turns.
Trading - On your turn you may trade resources with the bank by swapping any three identical resources for one of your choice. You may only trade with the bank on your turn as taking over the countryside is a busy business, however all non-active players may trade freely with each other. These inter-player trades can be done at any rate they wish. If a player trying to trade is about to become the active player while in the middle of a trade, they are allowed to finish it off immediately, otherwise the trade will be cancelled. The active player is never allowed to trade with a non-active player. As well as players trading Resource Cards they can also offer to trade future resources as promises, but these do not have to be honoured if a player changes their mind later. You can also offer Resources for free as a bribe, often to get a Nuke dropped on your rival!
Nukes - If you decide to launch a nuke then you enter the other warfare action, preventing any trading or building of things, with the exception of Nukes which can be built provided you already have the resources.
To launch a Nuke you either need one that is ready or the required resources. When using a ready Nuke then flip the token over to the spent side. If you spend resources then take a Nuke token from the supply already on it’s spent side. Choose a region adjacent to one you control and nuke it, every unit in the region takes 1 HP damage. So all humans and damaged herds are removed then all healthy herds are damaged. Buildings are unaffected by Nukes.
Once your Nuke was launched if another player’s region was targeted then they will have a chance to respond first before you can launch a second, provided they have either a readied Nuke or the required resources (without trading). They are allowed to Nuke any region adjacent to the one just attacked, even if they were completely eliminated from it, or any other region adjacent to one they control, even launching a Nuke at a completely different player if they want to! If a retaliatory Nuke is launched and a player is targeted then they get a chance to launch a retaliation Nuke, and so on. If a player launches a Nuke and the attacked herds do not launch one back, then they can keep launching Nukes until someone interrupts or they choose to stop, and then you can return down the chain of Nukieness.
An Example Of A Complex Nukiness Chain :-
- The Cows decide on their turn to Nuke the Chickens
- The Chickens retaliate, but instead on their arch-enemies the Pigs.
- The Pigs also retaliate, but they go after the 1st-place Rabbits. As the Rabbits have no ready Nukes the Pigs launch another on them. Then they launch a third at the Cows.
- The Cows decide not to retaliate, the Pigs are done, so it’s back to the Chickens, who see the Cows still have a Nuke and opt to launch against the Rabbits, then stop.
- Finally back to the Cows who cannot pay the resources to launch another Nuke and so they proceed with their turn, entering Phase 3. They roll resources and gain the Weapons they needed, proceeding to use them to launch another Nuke, although their enemies have also received resources and now may be able to retaliate…
End Game

Once a player reaches 10VP they can declare it instantly and immediately win the game. A player’s total VP is made up of:
- 1 VP per Barn
- 2 VP per Armory
- 1 VP per token gained through taking opponent’s territory
- 1 VP for controlling the Nukiest tile
- 1 VP for each played Spy card that provides VP (remembering that these can be played at any time)
2 Player Variant
In a two player game you will include a third neutral herd in the game and be playing one of three scenarios, with a few rules relevant to all and some that are specific.
For all the scenarios you will have a set turn limit to eliminate the neutral player, otherwise both players lose, then whoever has the highest VP when the neutral herd is gone will be the winner. In two player you do not gain any VP tokens for conquering other regions, so turmoil tokens will not be needed during the game.
For scenario set-up removed the following mutations: Adorable, Flying, Insecure, Parasitic and Radioactive, as well as both Extra and Ballistic if you have the additional deluxe mutations. Both players get dealt 3 mutations to choose from at the start of the game, and for the additional starting resources player 2 gets two cards, but they need to roll the resource dice to determine what they are, re-rolling wilds.
Scenario 1 and 2
The neutral herd for these scenarios will use the Adorable mutation. Set up the map according to whichever scenario you choose. Each scenario’s time limit is 8 rounds so you can stack up 8 turmoil tokens to mark this, remove one each time player 2 finishes their turn, if the last one is removed and the neutral herd has not been eliminated then both players lose.
Neutral Herd - The neutral herd does not take any turns nor do they gain any additional herds. Each region they control starts with a VP token, the first player to conquer the region gets to take the token. The two central regions are overlapped by an Armory, this only gets destroyed if both regions are empty of herds and humans and one of them is conquered. Once the last neutral herd is removed from the board then finish the turn, the other player does not get an extra turn. At the end of the turn the player with the most VP wins, and in the case of a tie then victory goes to player 2.
Scenario 3
This is very similar to scenarios 1&2, but with a few changes.
The neutral herd has the Radioactive mutation instead, and the scenario will last up to 10 rounds. After setting up the map use the remaining 10 VP tokens stacked up to mark the timer, however, each time one of these is removed then place a neutral herd at the neutral barn if they have any available. In order to eliminate the neutral player in the scenario you only need to eliminate their buildings to trigger the end round, they can still have herds remaining.
There are regions containing multiple VP tokens and conquering one of these awards all the tokens. The two leftmost regions have access locked off to the players to begin with, to unlock a region you must remove all the bordering turmoil tokens, defeating all neutral herds in a region to the right of a turmoil token will remove it.
And there you have it, that’s everything you need to know to play Farms Race! There are many more clarifications and FAQs on the different Mutations available out there, but for the most part many interactions should make sense at first glance. Happy Nuking!
About the author
Hi I'm Sean, chocolate factory operator by day, Zatu blogger by night. I'm a fan of all games but a bigger fan of anything with dinosaurs. Come check out my gaming pics and videos on my socials: https://m.youtube.com/@franksiegames https://www.instagram.com/franksiegames/